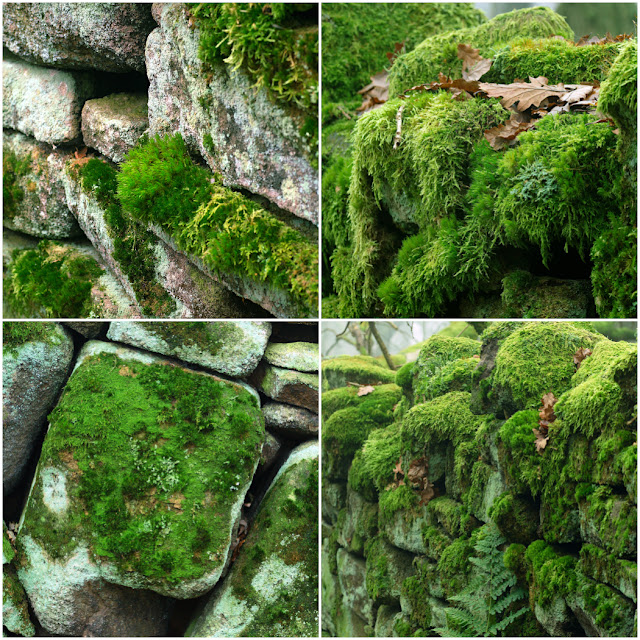
This time of year we have the panel of 4 competition. This means putting 4 images together into one image.
Because I only do this once a year I have to relearn over again how I do it again from scratch.
So this is my attempt to reduce that process and show my technique for creating such panels.
I use in Photoshop CS2 to do this. Other editing tools maybe equally as good, but photoshop gives me some extra precision. While this description is specific to CS2 I am sure the same process will work in later Photoshop versions or elements. I have not investigated other packages such as Serif Affinity
The Process
First we have to decide our layout. I normally do this with a sketch on paper. This method works best when there are 4 equally sized images. If you want images of different sizes, it is more complex, but some of these techniques will also help in that scenario also.This is the layout I am trying for. Basically 4 aligned images with a equal margin around them.
The critical measurements are the maximum size of the canvas which the images will be displayed, the width of our margin or frame. These in turn define the size of our panel images.
1st step is to calculate how big each image is going to be.
In my case I want each image to fit in a maximum canvas size of 1400px x 1050px, This in turn gives us our maximum size. I also want some sort of frame around each individual panel so this needs to be taken into account.
I want to have a margin of 4 pixels around image. In choosing a frame size it is easier to choose an even number of pixels, since it means you will not end up with half pixels in your image sizes.
The process is therefore
1. Decide the maximum size of your canvas
2. Decide the size of your margins
3. Workout the maximum size of your panels
4. Create your panel based on 1,2 and 3.
Working out the size of your image
(Warning this may contain maths)Each image size will be calculated based on the following
(length of canvas side - (3 x margin size))/2
As an example say we have a standard APS-C image size of 6000x4000 that we want to fit into our canvas with a margin size of 4 pixels
On the longest side, our new size would be (1400-(3x4))/2 which equals 694 pixels.
Because we want to maintain the image ratio, that would mean our new height would be (694/6000)*4000 which is ~463 pixels.
That would mean the minimum height of our canvas would (3*4)+(463*2) or 938 pixels. Since this is within our required canvas size we will be OK. If this is not the case, you may want to use the height of the canvas as your initial canvas measurement
Therefore we need the following:-
- A new image of size 1400 pixels x 938 pixels with a background of the colour you want your margin to be
- 4 images, each of size 694pixels by 463 pixels
Creating the panel.
We create a new image of the required size. In our example we will create a canvas of 1400 x 938 pixelsWe then need to place each image in the right place.
We take our 1st image and using the resize option in photoshop, resize it to 694 pixels x 436 pixels. We select and copy the image and then paste it into the new canvas. It should appear as a new layer.
The next step is to place the image accurately. This can be done by hand, but it is more accurate to use the edit -> free transform tool
Select the layer you want to position and select the free transform option.
In the menu bar at the top, you will see a set of 9 dots in a shape of a square and next to that a set of dialog boxes. These define the image coordinates and what the values measurements are relative to.
We want the measurements to be relative to the background image top left hand corner. To do this click the square of dots in the top left hand corner.
In the position X dialog entry, enter the size of your margin (e.g 4 px). Similarly do the same in the Y box. The layer should now be moved to the top left, with a margin of 4 pixels from the background canvas.
Click the tick box in the top menu bar to accept the transform.The 1st image should now be in the correct position in the top left with a 4 pixel margin between it and the edge of the canvas.
Now resize and paste the 2nd image, which is to be placed in the top right.
Again do a free transform, however this time the X coordinates will be (Frame size+Image Width+Frame size).
The process is the same for the images in the bottom left and bottom right, although the coordinates will be different. Here is a list of the coordinates :-
X Y
Top Left Frame Width Frame Width
Top Right (Frame Width*2)+Image Width Frame width
Bottom Left Frame Width (Frame Width*2)+Image Height
Bottom Right (Frame Width*2)+Image Height (Frame Width*2)+Image Height
So in our case the coordinates will be
Image 1 (4,4)
Image 2 (702,4)
Image 3 (4,471)
Image 4 (702,471)
Once you have done all 4 images, the image should be aligned with a frame around it.
To finish you can expand the canvas to its maximum size by using the canvas resize tool to set it to the final size (1400 x 1050 pixels) with a black background set.
If you have images of different sizes more work is required, but the free transform tool is still the most accurate method of aligning images.


No comments:
Post a Comment