Monday, 27 March 2017

Photographic Show 2017


Don't laugh. One day your cameras will be here too


Every year, I declare that I will not be going to the annual UK photographic show. However like a Caribou following the herd, I again found myself driving down a rain sodden M6 to the industrial wasteland which goes by the name NEC to find new and innovative ways to burn holes in my credit card.

This year I had even fewer excuses than normal to go. I have lenses My lens that cover most of my needs from a stonking zoom through a decent macro and ending up with reasonable wide angle. I am still getting to grips with my Sony A6000, and my DSLR, while long in the tooth and probably need of an upgrade is going OK. In short I had no real reason to go

That last paragraph is in fact a total lie.
follow the light......
One of the curses of photography is that you never stop thinking that you are only a new lens or body from becoming that world beating photographer I want to be. Problem is I have just about exhausted the relative cheap options. Any improvement in lens or cameras will require the spending f serious amounts cash. To spend the amounts I would need to do to get any significant improvement would require considerable amount of research and thought and definitely something you don't want to do in a whim in a show like this.

As for the show itself? Well I have two big issues with this photographic show.

Firstly the show likes to present itself as a festival of photography and you would imagine that with so many photographers in attendance the organizers would take the opportunity to celebrate photography in all its forms.

Nothing could be farther from the truth.

In truth it is glorified trade fair. This can be evidenced from how they treat the photo exhibitions. These are mounted in the eating areas where you have to dodge supine members of the public lying like beached seals against the boards.  I really wish the organizers would provide a gallery area with proper lighting and mounting, but I guess that would reduce the amount of selling space available.


Secondly issue is the NEC itself.

Even after you have paid for the tickets itself, the costs just mount. Despite having car parks the size of Belgium, they still feel the need to charge you £12 for your stay . A collection of adverts masquerading as a show program comes in at £5 and what is euphemistically termed food  is sold at prices that someone attending a West end restaurant would feel aggrieved about.

Then there is the venue itself. For a show that should be about the art of photography, the NEC has the warmth and ambiance of an aircraft hanger.

So lets recap. I had nothing to buy, do not like the show and will be paying hover £30 for the privilege of going.

So why did I go?

Well firstly, it is close. My total journey from work or home is only 40 minutes, which makes it a temptation

Secondly is the herd thing. It is the feeling that if I was not there I could not be serious about my hobby, which is of course total bullshit.

Finally despite its limitation, it is a place where you can play around with a huge mix of products, and hopefully I would get some sort of inspiration or new ideas.

This year I could only make it half a day. This is however not a bad thing. I find any more than 3 hours and both my physical and mental muscles are tired out. After 3 hours I really need to leave since I am at my most susceptible to any sales patter and could easily be persuaded to part  with a large amount of cash for a product I have no use for.


Unfortunately this meant that I had little opportunity to visit any talks or lectures. Considering the number of friends and colleagues who came home with a new printer, the one by Doug Chinnery seems to been the one to go to and I'm sorry I missed it. However I did catch the talk again by sport photographer, Bob Martin, who is always a pleasure and  inspiration to listen too. When I get to go to the Olympics as a sport photographer, I am sure his advice will be invaluable :)

Bob Martin, sports photographer extraordinaire 


I also noticed some changes this year. One welcome change was the move away from scantily clad models (mainly female) on the camera stands. This hopefully is a sign that manufacturers are growing up and being more inclusive. Another obvious change was the number of drones sellers this year showing how big drone photography has be come in recent years.

There is always one...


What was as interesting was the what was missing.

Sigma seemed to be the only major lens manufacturer there. Of the main camera manufacturers, Leica did not show up, maybe feeling that the venue were beneath them.

After there impressive showing last year, Serif were not hear meaning out of the photo software companies, only Adobe had any presence.

In terms of new technology, Fuji was the most interesting. I still think their cameras can take retro a tad too far, but they are a work of art and the lens line up is well thought out and high quality. I was also interested in their new medium format camera, the GFX 50S.  It took fantastic images, but the suggestion that it could replace a dSLR for general work seemed unlikely due to its weight and size. However I would not be surprised to see more professional landscape photographers migrating to it, if for no other reason to differentiate themselves from full frame cameras, which are starting to filter down pro/am photographers now,

Talking of which I had a go on the Sony A99ii, which seemed a very good camera, if not a tad heavy. However its price plus the need for full frame lenses will probably be forever out of my reach.


So did I come away with anything? Well apart from a few magazines,I got a reasonable priced travel tripod for a coming holiday. I was also interested in a few products. I have a yearning for a camera trigger systems, but whenever I look at them they always feel a bit expensive for what is nothing more than a sensor trigger and a adjustable timer. I feel it is something I could knowck up myself if I had the time and inclination. I also liked the macro lights by adaptalux. I have desire to do more macro work and these looked good for lighting your subjects. Again however they seemed quite expensive for what they were, but well engineered and put together.

So after all that, will I go next year? At present, no, but I said that last year and i ended up anyway. Maybe I am approaching the show in the wrong way and I should go with a group. After all if you are going to follow the herd, you might as well be part of it


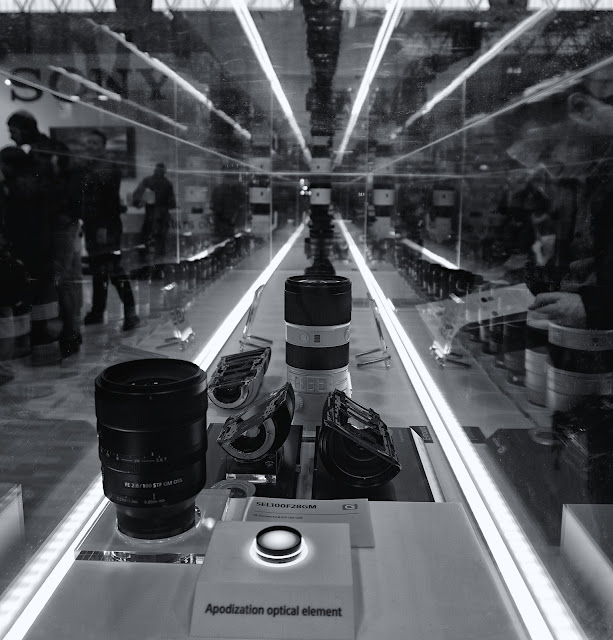
Sony juggling


Exit please


Sunday, 19 February 2017

The Rules of Composition

Last week we had a interesting talk from Tony Pioli on composition at the photography club.

Now composition is one of those subjects which I know the theory well, but struggle to put it into practice when in the field.

The talk concentrated largely on landscapes, and one interesting point he raised was the tendency for the eye(well the western eye anyway) to favor left to tight images.

This I will demonstrate this with some of my best images...

The rule of thirds is a well known rule(well, guideline) in photography. The concept is that the strongest points on a photograph must lie on the line or a intersection from a grid splitting a picture up in thirds.


 The left to right rule takes this a step further and says in a image with one strong vertical, the vertical should lie on the right third of the image.

In theory the image is now stronger


This is quite a simple concept and best of all can be relatively easy to achieve post processing. If the image is on the left third you simply flip the image in the editor.

The other rule was the L rule.  That is a picture is strong if it forms a L shape, with a strong vertical on the right . Now this seems to break the left right rule, but the caveat to this is that it needs some interest in the other 2/3's such as clouds. If that area is blank it will not work as well.

Clear Sky


with Clouds...


Those were the two rules which stood out of the talk. However there were others such as a image with one eye should be central and in still life images there height progression is low medium, high, medium.

Height progression


As simple rules they work well. Of course all composition rules should be taken with a pinch of salt. They are not really rules, but useful guidelines and often a picture stands out because it breaks the conventions not because they follow it. So the more important life lesson is not so much the rules themselves, but when to break them

Monday, 30 January 2017

A day with Rich and Verity

Verity and Rich point out the views


On the 26th November, I did something different.

I spent a day just photographing.

Now if I had my way it would be my default activity, but little things like earning money, looking after a family and all the other mundanities  of modern living means that even at weekends I am lucky to get with a camera for more than a couple of hours.

So how did I manage it this time?

It had been my plan all year to go somewhere a bit further afield with my camera. However I had been thwarted in that ambition largely by the need to transport my daughter to various open day destinations. .While I  love spending a day with my daughter, part of me did feel I had been slightly cheated out of quality camera time.

However in between the various doom and gloom that will forever categorize 2016, I had a tweet about a coming photography workshop run by Verity Milligan and Rich Jones, both photographers I had been following for a while(Verity in particular specializes in revealing the beauty of Birmingham, my home town).

A quick scan of  the calendar that cannot be disobeyed showed that my life (and more importantly my wife) had no plans for me that day. Even better it was within easy traveling distance(about an hour). So in a uncharacteristic fit of decisiveness I decided to go for it

Now the reason I don't often do these sort of things is that a) I am not always that comfortable in groups of strangers and b) despite my best efforts, I find it brings out a competitive side I am not totally comfortable with.

The latter reason my biggest fault. Rather than revel in opportunity for collaboration, I can feel I will be judged by my results. As soon as I feel my efforts are not meeting those around me, I go into a spiral of self-doubt, recrimination and envy. I know, childish, but I have come to accept that is who I am, and so I have built coping mechanisms one of which is not to put myself in such situations.

Despite all this on the 26th November, I crept out the house and set out on a early foggy November morning to Paddock Gorge in the the Peak District, where I was to meet up with Verity and Rich together with my fellow photographers companions for the day.

Now I like to think that I know the Peak District well, walking extensively both in the dark and white peak areas. However for some reason Paddock Gorge had never come on the radar. Which is a pity because for a landscape photographer it had a bit of everything. Lichen covered forests, stands of Silver Birch, a step of small waterfalls.

To  be fair the fog meant that much of this was not instantly viewable. However the fog added something else, wonderful misty forests with great layering and depth of field of the trees. We had a chance to take some images of the stream that tumbles down the gorge. This was a good chance to get the ND filter out and try some milky water shots. To be honest these could of gone better, but I got a couple of shots of which were not too bad.

After lunch at a rather fine local hostelry,  the decision we made to go to surprise view. This was aptly named because the fog had come right down and it was almost impossible to see anything. However it did allow for some shots of shadows of misty trees. However just as we were thinking of giving up for the day  and the sun started going down, surprise view really lived up to its name as the fog condensed into the valley bottom, given one of the finest cloud inversions I have ever seen.

All in all, we could not of asked for better weather for photographic opportunities.

Which left me in a dilemma. What if my photos turned out to be pants? Now I could not blame the the landscape, or the weather. I even had advice on hand to help me get the best shots. If the shots did not turn out great, I only had myself to blame!

For that reason, I was very reticent in processing the images. In fact I didn't start looking at them in detail until late December. My initial impressions were of disappointment as I realised that photos had not really done justice to the day. This was not helped as images filtered in from the other members of the party on social media, seemingly putting mine to shame. 

Still as I reviewed them more I started elements I liked and eventually I manged to tease out acceptable shots. Of course there were some missed opportunities. For example there was a great ice bow on the day, but i did not think to put on a polarizing filter, so I failed to get any great definition.

However in the end I got some shots I really like, now I have had time to think about them.

So would  I do it again?

Well, if they could guarantee the same weather and views, I would say yes in a shot.  Both Rich and Verity were great company on the day, and I did take away some useful lessons from the day. My only regret was that I did not use there expertise as much as i should.

That was purely my fault.I think the best lesson is that if you pay to go on these sort of courses, leave all your experience behind. You have paid to learn, and the best way to do that is go with a blank slate.

Ended up with a lot of B&W. Silver Birch and fog, it is a winning combination

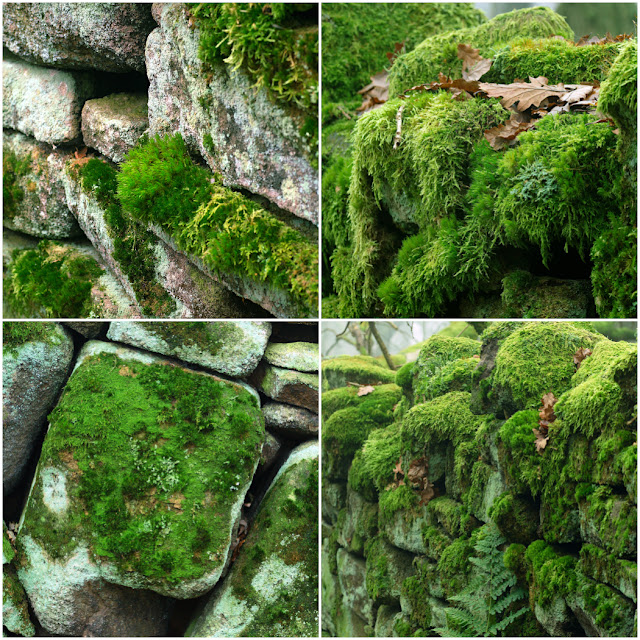
Got some great detail shots of this wall with moss. Must admit, one of my favorite images

Another B&W Silver Birch shot

The ephemeral qualities of this stand of Birch trees are great


This was a late bloomer, but put in B&W and with the fog background, I love the simplicity of the image

Surprise view living up to its name

Probably the only ND I was happy with. It took a while to get a position. I tried ages to get some leaves to swirl. in the end I gave up and had to be content with two still ones

As the sun burnt through, the colours were great


The cloud inversion


Friday, 13 January 2017

new year resolutions

So a new photographic year begins. What to do...

In truth the weather has been uniformly dreadful recently so it there has been little point going out, however the need to get back on my photographic horse was driven home to me yesterday in the 1st competition of the new year.

This was the panel of 4, which generally I enjoy since it provides some release from the constraints of things like wildlife competitions.


So how did I do.

Easy answer.....mixed.

While my prints were just a smidgen off 3rd place, unfortunately I had to be content with just a highly commended.The judge wanted to give very highly commended. However such a label does not exist and therefore the results will always show I was just an also ran.

The DPI however was even more disappointing. I was one of only 3 images not to be held back. This was a surprise because I thought the images and panel was strong.

In hindsight I still believe this, but I now feel I fell into the trap of not being ambitious enough. The winning entry was very different and in the past it is the kind of image I would of aspired to do. This time I just put 4 images together.


The failed entry....


That is the crux of my new year resolution. Recently I have become too orthodox. I have substituted quantity, rather than planning what my photos should show . I need to pare back and start adding some new long term goals.

I always said I would rather be considered different than good, but orthodox so it is time to rediscover that mantra.

In other news I have found that 2 photos got accepted for NEMPF, so this is a really good result and a step up in class. However it looks like I will have to now go by the name Derek, since that was how one of the images were labeled.

Maybe I should use that name from know on, since it is apparent Derek knows  more about photography than I do :)


Wednesday, 11 January 2017

Creating a panel of 4


This time of year we have the panel of 4 competition. This means putting 4 images together into one image.

Because I only do this once a year I have to relearn over again how I do it again from scratch.

So this is my attempt to reduce that process and show my technique for creating such panels.


 I use in Photoshop CS2 to do this. Other editing tools maybe equally as good, but photoshop gives me some extra precision.  While this description is specific to CS2 I am sure the same process will work in later Photoshop versions or elements. I have not investigated other packages such as Serif Affinity

The Process

First we have to decide our layout. I  normally do this with a sketch on paper. This method works best when there are 4 equally sized images. If you want images of different sizes, it is more complex, but some of these techniques will also help in that scenario also.

This is the layout I am trying for. Basically 4 aligned images with a equal margin around them.

The critical measurements are the maximum size of the canvas which the images will be displayed, the width of our margin or frame. These in turn define the size of our panel images.


1st step is to calculate how big each image is going to be.

In my case I want each image to fit in a maximum canvas size of 1400px x 1050px, This in turn gives us our maximum size. I also want some sort of frame around each individual panel so this needs to be taken into account.

I want to have a margin of 4 pixels around image. In choosing a frame size it is easier to choose an even number of pixels, since it means you will not end up with half pixels in your image sizes.

The process is therefore

1. Decide the maximum size of your canvas
2. Decide the size of your margins
3. Workout the maximum size of your panels
4. Create your panel based on 1,2 and 3.

Working out the size of your image

(Warning this may contain maths)

Each image size will be calculated based on the following

(length of canvas side   - (3 x margin size))/2

As an example say we have a standard APS-C image size of 6000x4000 that we want to fit into our canvas with a margin size of 4 pixels

On the longest side, our new size would be (1400-(3x4))/2 which equals 694 pixels.

Because we want to maintain the image ratio, that would mean our new height would be (694/6000)*4000 which is ~463 pixels.

That would mean the minimum height of our canvas would  (3*4)+(463*2) or 938 pixels. Since this is within our required canvas size we will be OK. If this is not the case, you may want to use the height of the canvas as your initial canvas measurement

Therefore we need the following:-


  •  A new image of size 1400 pixels x 938 pixels with a background of the colour you want your margin to be
  • 4 images, each of size 694pixels  by 463 pixels


Creating the panel.

We create a new image of the required size. In our example we will create a canvas of 1400 x 938 pixels
We then need to place each image in the right place.

We take our 1st image and using the resize option in photoshop, resize it to 694 pixels x 436 pixels. We select and copy the image and then paste it into the new canvas. It should appear as a new layer.

The next step is to place the image accurately. This can be done by hand,  but it is more accurate to use the edit -> free transform tool

Select the layer you want to position and select the free transform option.

In the menu bar at the top, you will see a set of 9 dots in a shape of a square and next to that a set of dialog boxes. These define the image coordinates and what the values measurements are relative to.

We want the measurements to be relative to the background image top left hand corner. To do this click the square of dots in the top left hand corner.

In the position X dialog entry, enter the size of your margin (e.g 4 px). Similarly do the same in the Y box.  The layer should now be moved to the top left, with a margin of 4 pixels from the background canvas.

Click the tick box in the top menu bar to accept the transform.The 1st image should now be in the correct position in the top left with a 4 pixel margin between it and the edge of the canvas.

Now resize and paste the 2nd image, which is to be placed in the top right.

Again do a free transform, however this time the X coordinates will be (Frame size+Image Width+Frame size).

The process is the same for the images in the bottom left and bottom right, although the coordinates will be different. Here is a list of the coordinates :-

                           X                                                    Y
Top Left            Frame Width                                   Frame Width
Top Right          (Frame Width*2)+Image Width     Frame width
Bottom Left      Frame Width                                   (Frame Width*2)+Image Height
Bottom Right    (Frame Width*2)+Image Height     (Frame Width*2)+Image Height

So in our case the coordinates will be

Image 1 (4,4)
Image 2 (702,4)
Image 3 (4,471)
Image 4 (702,471)

Once you have done all 4 images, the image should be aligned with  a frame around it.

To finish you can expand the canvas to its maximum size by using the canvas resize tool to set it to the final size (1400 x 1050 pixels) with a black background set.

If you have images of different sizes more work is required, but the free transform tool is still the most accurate method of aligning images.


Wednesday, 23 November 2016

NEMPF Selection

I have started recently entering some external competitions. I decided to be ambitious and start at the top and entered a few pictures into the landscape photographer of the year competition.

Disappointingly, but unsurprisingly, I failed to get even shortlisted so I decided to set my sights a little lower.

This year, for the first time I entered 12 images into NEMPF annual show.  NEMPF or the north and east midlands photographic federation is our photography club parent association and covers clubs as far a field as Peterborough.  As a member of a affiliated club, I had the opportunity to enter 4 photos in the 3 categories, colour, nature and monochrome. Members from all the clubs enter images and the federation pick the best of those. So you could say they represent the best of the best in the East Midland region.

Recently I found that one of my images had been accepted, which is fantastic news. I also feel it is a great sign that my photography is still improving which is all I can hope for.

This was the accepted image


There is a bit of a back story to this image.

 It was taken on Flamborough head, Yorkshire, early in the morning. We had been camping nearby, and I saw the weather reports looked promising, so I managed to sneak out at about 4:30 a.m and sneak off. It was about 5 minutes drive and I clambered down to the beach with a tripos, my DSLR and mirrorless camera in tow.

The photo was taken with a ND filter to smooth the sea, but the light was just right hitting the cliffs and it was one of the few occasions that I felt in control of getting the image.  As you do in these situations I got greedy and felt that it would be even better if I got closer to the waves and lower down.

I set up the tripod and since the light was increasing I decided I had to recalculate the ND exposure time. I use an app on my phone to calculate the ND exposure so I looked up the new exposure.

Unfortunately I had forgotten that the tide was coming in at this point...fast. I looked up from my phone and realised to my horror, my feet and the tripod were about to be inundated by an incoming wave.

Now in hindsight, I should of accepted that my feet was going to get wet. My DSLR was safe on top of the tripod and I could of easily just picked it up and calmly moved back a few meters.

This is what actually happened...

I saw the wave, panicked, made a grab for my tripod, while trying to retreat. My feet slipped and I fell. My hand that was gripping my phone was put down into the sea to steady me and my other camera  hanging around my neck also got submerged.

The result was soaked feet and trousers,  one ruined phone and camera, and a lot of hurt pride. Fortunately my DSLR was not touched, but it put me off taking any more images as I rushed back to the camp site to try in a vain hope to dry the camera and phone out. Fortunately the images on the the otherwise dead camera were OK.

One saving grace was that no one saw me fall, but this was offset by the total lack of sympathy and gales of laughter when I got back to the tent and explained to my wife why my trousers were soaking.

So I'm glad the picture has achieved some success,since the cost of getting it was quite a lot...


Wednesday, 26 October 2016

The 7 Stages of Wildlife Photography

The challenges of getting close to the subject :)


It is the time of year when nature takes its course and the deer start thinking about making the next generation.

Yes it is the deer rut, an annual event that has been going on well before man walked the earth, but is none the less exciting for that.

While not everyone can attend the deer ruts in places like deepest Scotland, it can be equally well seen in the various deer parks up and down the country.

The closest public one to me is Bradgate Park, a large area of moor and woodland which once belonged to the family of Lady Jane Grey, of Elizabeth 1st fame. Within the park there are herds of both red and fallow deer.

Every year without fail I plan to go, but apart from a few short visits with the wife and kids, I never seem to quite make it. This year the local camera club planned an early assault, and for once my calendar did not clash.

This required an early starts, so it was a question of getting up at 5:30 a.m for a 6:30 a.m start in order to try and capture the sunrise.

Generally in these sort of situations you already have an idea of what type of image you want to get. Two images that have proved popular recently is the one of deer(s) silhouetted against the rising/setting sun and the ones showing the breath condensing from the stags mouths. Also there is always a hope of catching the males fighting.

However it is often best not to make firm plans in these sort of events. Relying on the weather and indeed the wildlife in the UK is a bit of a fools errand.

Despite that I tend to find I go through the same stages when photographing wildlife.


1. Anticipation

The night before I go off, I cannot help but anticipate the great images I am going to take, despite experience otherwise. The night before I have to plan what kit I am going to drag with me in order to get those shots. It was hard to see past my 150-600 mm zoom, but I packed others plus a spare camera just in case.

The next question was tripod or mono-pod. A Tripod would be more stable, but heavier to carry around. A mono-pod would be more convenient and lighter, but would it be stable enough in low light?. In the end I thought convenience outweighed (sic) stability.

I always believe at this time that I am only hours away from that great image...despite experience showing otherwise

2. Optimism

One of the criteria and challenges of wildlife photography is the weather.  For the image I wanted of the deer, I needed either clear skies or high cloud in order to get a good sunrise or cold air to create a good atmospheric mist. Therefore there is much studying of the weather the night before, both through weather forecasts and looking outside. However dire the reports, I always at this point believe that the weather will turn out OK anyway. After all,  weather men what do they know?

When we entered the park it was pitch black. Its a weird feeling. All around you you hear large bodies hurtle through the undergrowth. Stag call out with that low pitched grunt they use to claim their territory. As your night vision improves, you catch sight of shapes moving either side of the path.  This is the confirmation that the rut is ongoing and therefore your hopes increase

3. Realization

As often happens. it is not long until you realize the weather is going to be, well,  British. 

We had low cloud, but disappointingly no mist. In reality the worst of both worlds. At least however it was not raining.

This meant that early morning visibility was poor and the light flat and dull. This is when you start to realize that maybe the day may not hold the promise you first hoped.

As the light increases you become aware  you are not alone. Other groups of photographers are waiting to do exactly the same thing you are.

4. Pessimism

Normally about an hour into the shoot, I start wondering why I came. The weather and light means that any shots must be taken with low speed and/or high ISO. The lens is struggling to find enough contrast to focus. You are cold, and to make matters worse, there are about 100 photographers around you with exactly the same ideas, so the chances of getting a unique shot seems increasingly remote.

The only good thing is that the Fallow deer at this time of year seem quite relaxed. One sauntered right up to us to feed to the chestnuts fallen from the tree under which we were standing.  This at least allowed some close up shots. However the big boys, the red deer, decided to keep there distance huddled in the private park areas.

5. Desperation

It is at this point that I start taking photos of anything, just to try and ensure the day is not wasted.

The light is still poor, so shots with the zoom will be noisy, but what else can I do? I start replacing quality with quantity and shoot at anything. Deer, local bird life, fellow photographers. I Just try to find an angle which none of the myriad other photographers have found, with little success.

6. Acceptance

After 2 hours I decide that this is not going to be my day and I start to wander off from the pack.

I start to forget about photography and begin to appreciate the surroundings. All around autumn is starting to show off its colours.  As you wander through the park , deer cross your path, look quizzically at you before scampering off.

Yes, it is not a great day for photography. but there are far worse places to be and it is a great excuse just to be out, walking and in the fresh air.

It is always at this point that something happens. I start seeing shots that I would otherwise not of noticed in my desperation phase. I relax and become more attuned with the surroundings.

Wandering up the hill to a landmark called Old John, I came across the main herd of red deer. Orbiting around them were all the king wannabe's trying to sneak in while the deer emperor protected his harem.  .

At this time of year red deer are far easier to approach, being distracted by more important matters than a few cameramen 

Of course what is really wanted is some stag on stag action.

In a small park like Bradgate, there is not the same level of competition as say the Scottish highlands, where the herds are bigger. While one stag was chased off, no fighting was to be seen. I find however in these situations that there is always a photographer on hand to tell you what you had just missed if you had been here hours/days before.

Still at least I get some shots of Red deer stags at their most resplendent.


7. Relief

So I get back home and  I upload the images to the computer with more hope than anticipation.

It is at this point that I find that not all the shots are terrible. Yes, they require some processing and ,no, there are no award winners, but it was not all in vain.

Also I got a good days walk and witness a small part of one of natures greatest spectacle.

To be fair, there are much worse ways to spend a Saturday in October....

Here are some images from that day...


as you can see fallow deer vary widely in colour, from white to almost vlack

Ignoring the deer, there were worse places to be


seeing off the competition

The victory dance